Using the Policy Template
Purpose
The policy template is a preformatted Word document that contains all the required fields in the header and footer. You can easily draft a new policy by replacing the field names on the form with the correct information for your proposed policy.
Download the template
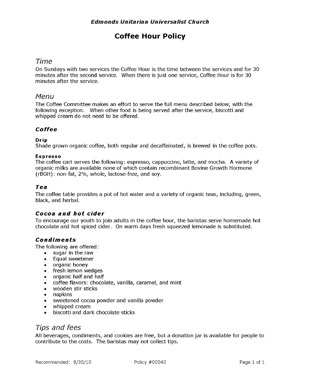
Sample of a completed template (doc)

File name
Save the file (00000_draft.doc) so that
- “00000” is the policy number.
- The word “draft” describes the version. As appropriate during the development cycle “draft” is replaced with “recommended” and then “approved.”
- “.doc” is the file extension that must be used. This indicates the document is in the format of a Microsoft Word 2003-07 document.
Header

Delete “Title of the” and type the name of the policy you are developing.
Footer

Version and date
The word “draft” describes the version. The version and date will change to “Recommended: mm/dd/yy” and finally to “Approved: mm/dd/yy” as the policy moves through the development cycle. For details, read Add or Change a Policy.
#00000
Each policy has a unique 5-digit identification number that doesn’t change when the policy is updated. This enables us to definitively refer to a particular policy even if its name is changed.
Page number
The page number is displayed in the format, “Page 1 of 3.”
Can’t see the header and footer?
Word allows you to view your document in many ways. Your Word settings might be set to not display the page headers until you choose to view them. To see the headers and footers go to the View menu and in the Document Views area select Print Layout.
While you are working with the content of the document, the headers and footers are faded. To edit a header or footer, double click in the gray text and it becomes vivid at the same time the content portion of the document becomes gray. When you want to return to working with the body of the document, double click in the main content portion of the page.
Body

Why we use headings
Readers use headings to scan for topics related to their work. In a glance your headings can tell them whether your policy addresses topics pertinent to their work. That is, people look up the policies for a reason, nearly always to accomplish a specific task. They will read only the material that is likely to inform their work. Very few of us are policy wonks, devouring governance documents for general knowledge. Therefore, each heading should clearly indicate the topic discussed. Example of a policy using clear headings (doc).
Crafting good headings
Your goal is to make work easier and less time consuming for church members and volunteers. Well written headings help people quickly determine whether they need to read particular content.
Headings should clearly label the content to follow. Do not use metaphors, general labels, or intriguing headings designed to build curiosity so the audience will read the text to learn what it is about.
In crafting headings your job is to devise meaningful, concise, clear headings that people can scan.
Formatting headings
In the Body of the template are two pre-formatted heading styles. Replace “Main Topic” with your first major heading. If you have another major topic, copy the line with your first heading and paste it where you want your second major heading to appear.
When a major topic is divided into sub-topics, use the “Sub Topic” to label those areas.
Power Word users
If you like to use software shortcuts, you can use the Apply Styles menu in Word. In many versions of Microsoft Word, you can press Control-Shift-S to have the Apply Styles menu pop up. Then, to switch styles, just put your cursor on the heading line, and select Heading 1 for Main Topics and Heading 2 for sub-topics from the Apply Styles menu. Paragraphs should be given the style called Normal.
